《Unity Shader 入门精要》Chapter 8 — Reading Note
Transparent Effect
Transparent is one of the common effects in games. Usually we use the alpha channel to control the transparency of an object. When it’s set to 1, the object is absolutely opaque. When it’s set to 0, the pixel won’t display anymore.
There are two way to realize transparent effect:
- Transparency Test: When a fragment’s transparency doesn’t satisfy a specific condition (usually less than a given threshold), then this fragment will be discarded. Otherwise, it will be manipulated as a normal opaque object, including depth test, ZWrite.
- Transparency Blend: By this approach we are able to obtain the real transparent effect. This will use the transparency of the current fragment as the blend factor, and blend its color with the color already stored in color buffer using the blend factor, and finally obtain the new color.
Why rendering order is important
In transparency blend, we need to turn off ZWrite. That’s because if ZWrite is on, when we render a closer transparent object in fornt of another opaque object, its depth will be written into depth buffer. Then the behind surface will be removed, which means we cannot see the surface behind through the transparent object anymore, and that’s not what we want.
However, we need to pay attention to the rendering order now after we turn off ZWrite.
Example:

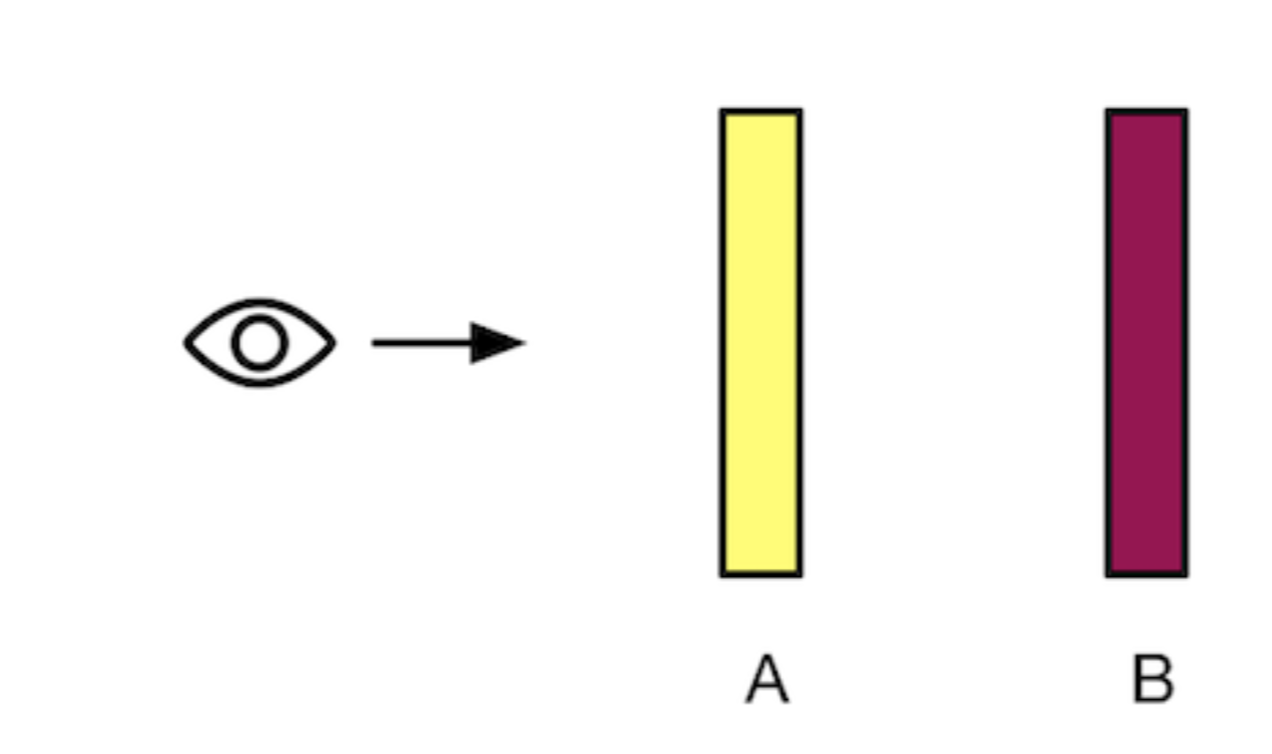
A(Yellow) is transparent, B(Purple) is opaque.
- If B firstly rendered and A secondly, it’s right.
- If A firstly rendered and B secondly. Because we have turned off Zwrite, the render of A will not change the value in depth buffer. Then when B is rendered, it will pass the depth test and overlay the value in color buffer. Then we will see B is in front A, which is wrong.
We also consider the case both two objects are transparent.
- If B first and A later, it’s right.
- If contrary, A will be firstly write into color buffer, then B will blend with A in color buffer, and we will see B is in front A.
The corrent rendering order
- Firstly render all opaque objects, and turn on their depth test and ZWrite.
- Sort all transparent objects according to the distance between the object and the camera. Then render these transparent objects starting from the farest one.
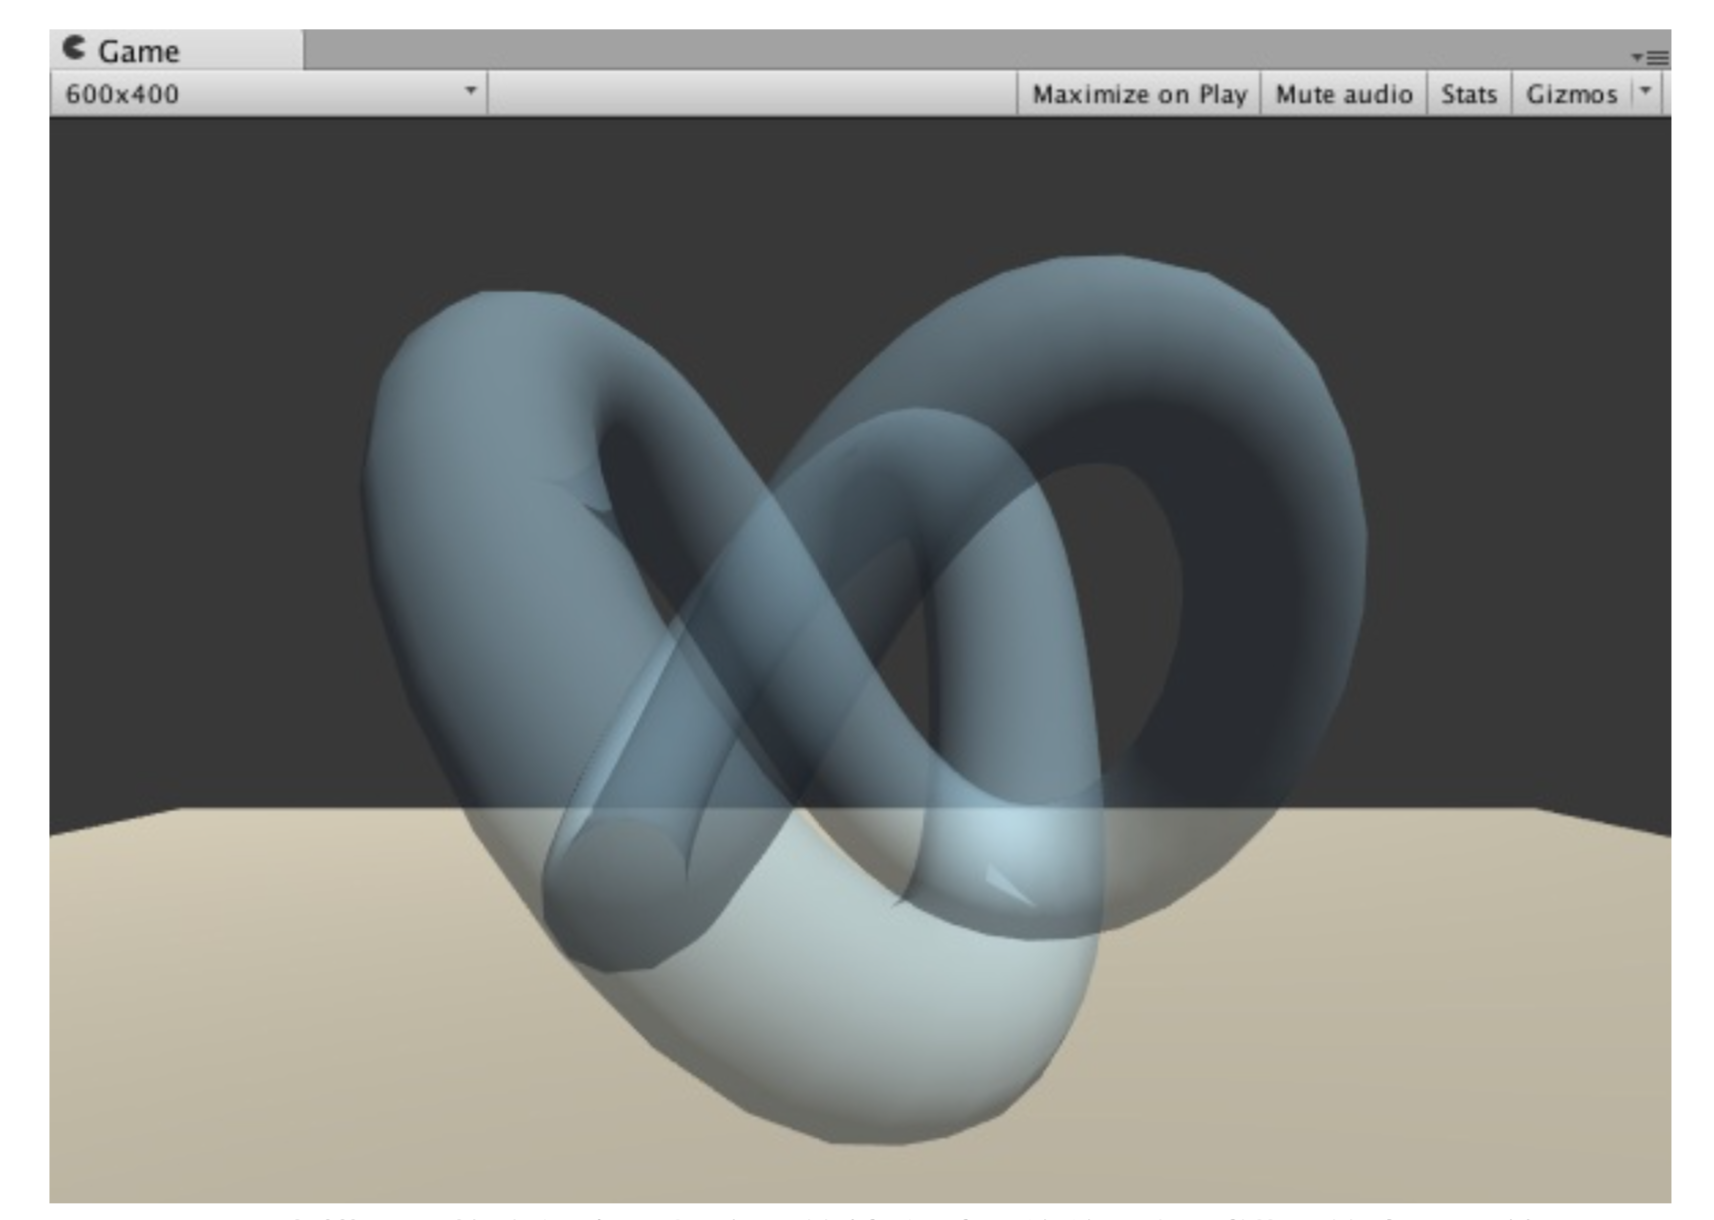
However, in some cases we will still meet some problems.

In this case we can deal with problem by dividing the grid. For example, in the above case we can split the object into two parts.
Rendering order in Unity
In Unity, we can set the render order by Render Queue. The Queue tag in SubShader decides which render group our model is in. The smaller its index is, the early it’s rendered.
- Background: Rendered before any other groups, usually for background.
- Geometry: Default render group, usually for opaque.
- AlphaTest: Usually for alpha test.
- Transparent: Usually for transparency blend.
- Overlay: Used to realize some overlay effect, rendered after any other groups.
Usage:
1 | Subshader{ |
Transparency Test
Usually we use clip function to do transparency test in fragment shader. clip is function in Cg.
void clip(float4 x);
void clip(float3 x);
void clip(float2 x);
void clip(float1 x);
void clip(float x);If any component of the given parameter is negative, then this pixel will be discard.
Transparency Blend
Blend means we use the transparency of the current fragment as the blend factor, and blend its color with the color already stored in color buffer using the blend factor, and finally obtain the new color.
In order to blend, we need to use the blend instruction provided by Unity — Blend.
- Blend Off: Turn off blend. (Default)
- Blend SrcFactor DstFactor: Turn on blend and set blend factors.
- Blend SrcFactor DstFactor, SrcFactorA, DstFactorA: Almost the same as above, with different setting of blend factors.
- BlendOp BlendOperation: Use BlendOperation instead of simple blend.
One common setting for the factors:
1 | Pass{ |
Because we turn off Zwrite here, sometimes we will obtain a wrong transparent effect due to the wrong sorting.

In practice, it’s not easy to divede the grid. Instead, we can try to reuse Zwrite.
Transparency Blend with Zwrite On
We use two Pass to render the model. The first Pass turns on Zwrite. Its only goal is to write the depth value into depth buffer, which means it doesn’t output the color. The second Pass processes the normal transparency blend. Because due to the first Pass, we have obtained the correct depth value per pixel, thus we can obtain the correct transparent effect. However, using one more Pass will consume more performance.
1 | Shader "Unity Shaders Book/Chapter 8/Alpha Blending ZWrite"{ |
The first Pass only writes the fragment’s depth into depth buffer, then culls off those behind. We use a new render command — ColorMask here.
ColorMask RGB | A | 0 | Any comination of RGBA
When it’s set to 0, it means this Pass doesn’t write anythin to the color channel, which is what we want.

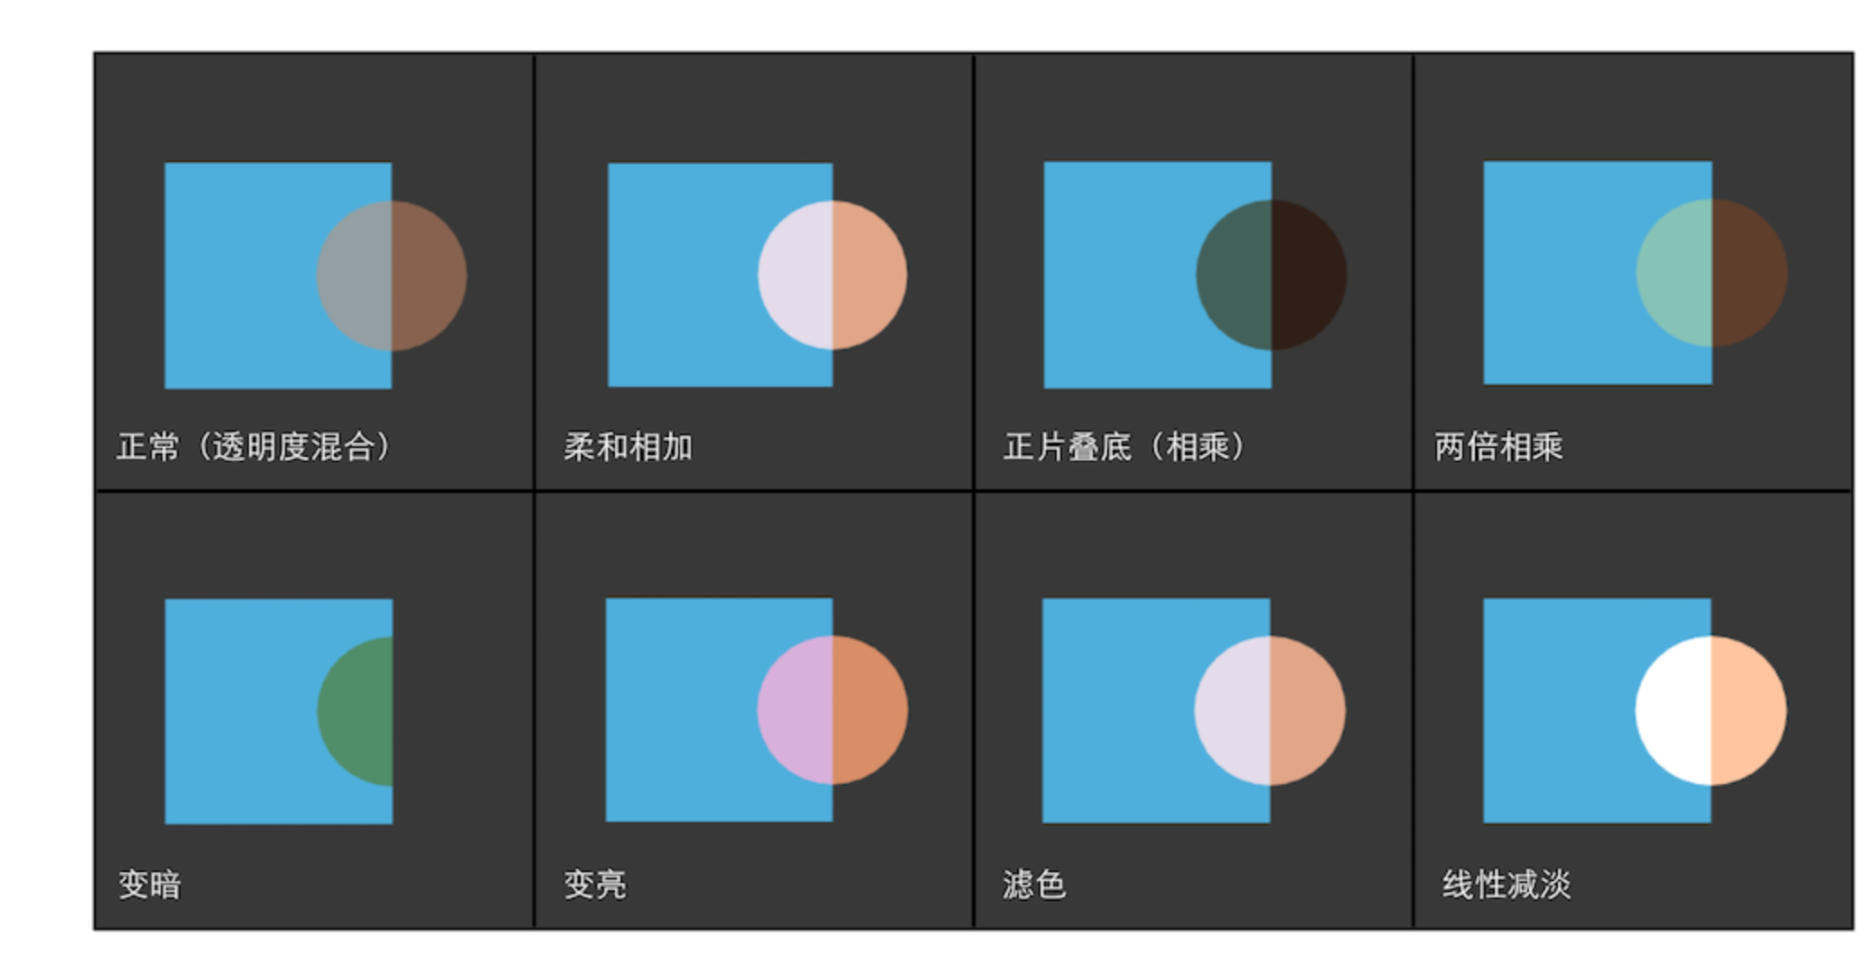
Common blend type
1 | // Normal |

Transparent Both Sided
By default, the render engine doesn’t render the backside of an object (relative to the camera’s direction). Therefore, no matter we are using transparency test or blend, we can only obtain the inside view and backside view. The object looks like only a half. To solve the problem (let’s say we want to obtain a double-side effect), we can use Cull instruction to control which side we would like to cull off.
In Unity, syntax of Cull is as following:
Cull Back | Front | Off
- Back: Default setting, the backside would not be rendered.
- Front: The front side would be culled off.
- Off: No culling. All primitives would be rendered.
1 | Pass{ |
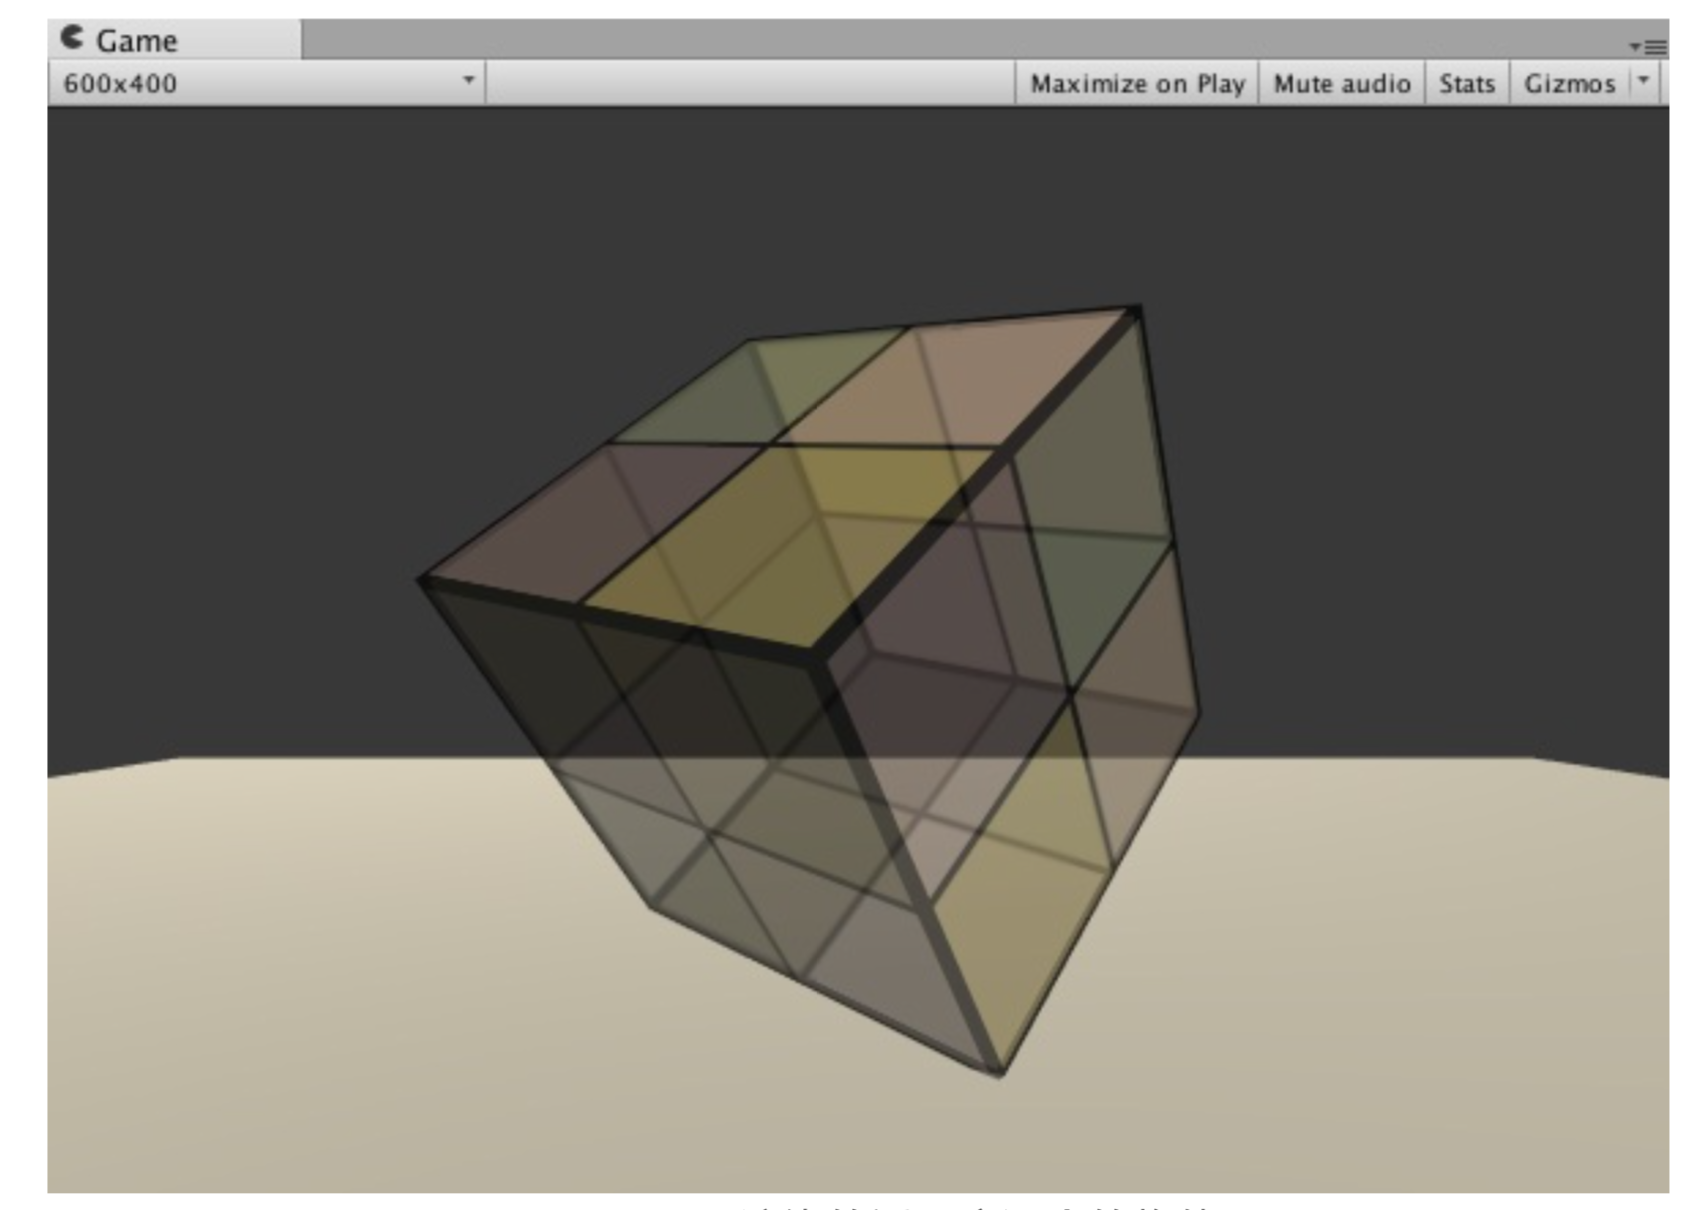
In transparency blend, we should pay attention to the rendering order. We know that the backside should be rendered earlier than the backside, but we have close ZWrite in transparency blend. To solve the problem, we can use two Pass to render both the backside and the frontside in order.
1 | Pass{ |
Finally we can obtain the following effect.
