《Unity Shader 入门精要》Chapter 7 — Reading Note
Basic Texture
Texture Mapping: Map a texture to the surface of the model.
- Texel: Unit of the texture (like pixel of the screen)
- Texture-mapping Coordinates: Define the corresponding 2d position of the vertex in a texture. Using a 2d variables (u, v) to represent. So it’s also called uv coordinates.
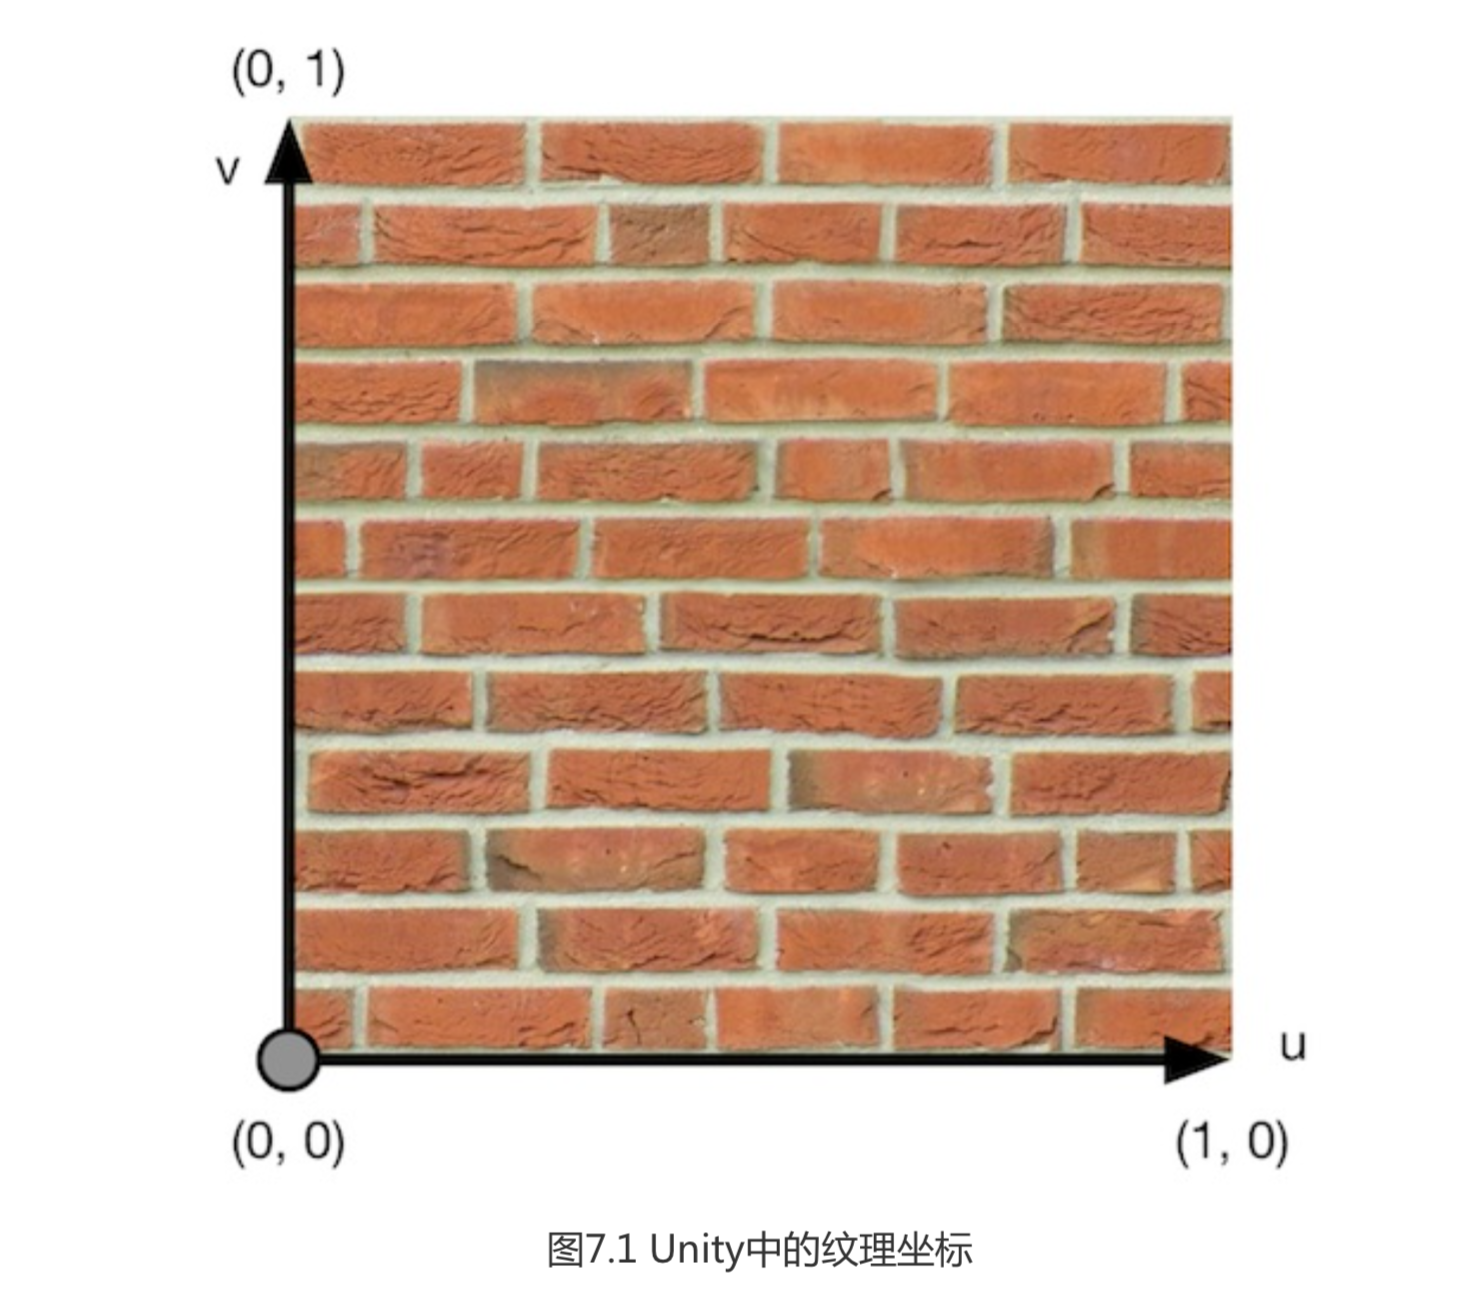
Single Texture
1 | Shader "Unity Shaders Book/Chapter 7/Single Texture"{ |
Some Texture Properties
- Texture Type: Use this to define what your Texture is to be used for. Unity will pass the right type of texture to Unity Shader, sometimes also do some optimization.
- Alpha Source: How is the alpha generated from the import texture.
- Warp Mode:
- Repeat: e.g. 1.1 -> 1.1 - 1 = 0.1
- Clamp: e.g. 1.1 -> 1
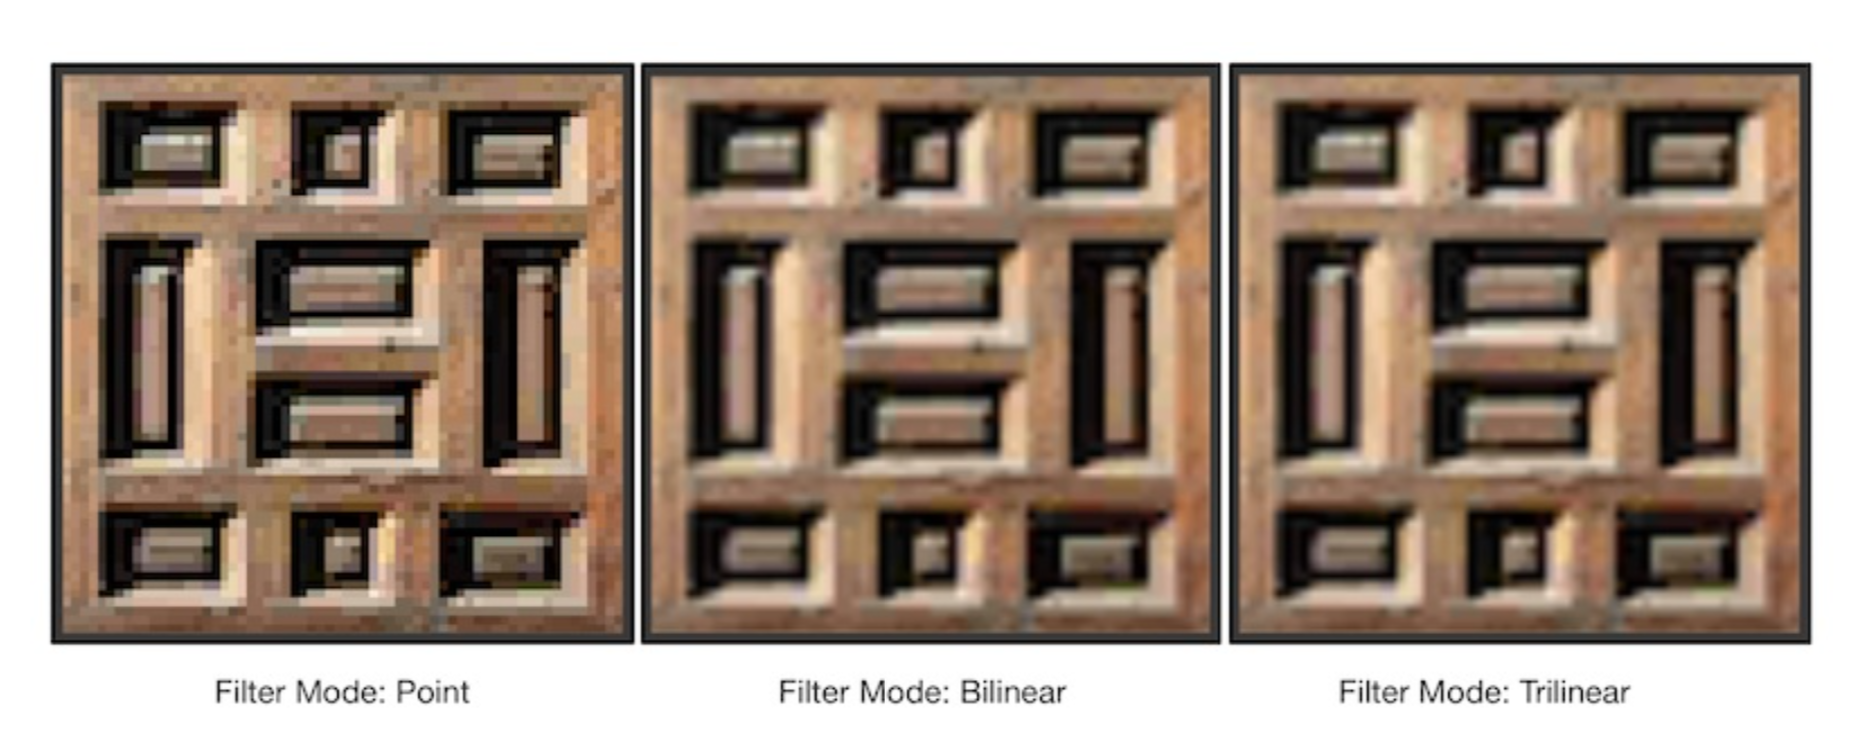
- Filter Mode: Filtering mode of the texture, filtered when texture produces stretch due to transformation.
- Point: Nearest neighbor filter, or no filter. Sample only one pixel point. Result in pixel style.
- Bilinear: Linear filter. Sample four pixel points for each target point. Result in blur.
- Trilinear: Almost same as bilinear, but blend with mipmapping. Better effect than bilinear.
- Max Size: Max texture size. When the size of imported texture exceeds the setting size, Unity will scale the texture to match the setting. If width/height is not power of 2, this will occupy more memory space and therefore cause performance problem. So it’s better to use texture whose width/height is power of 2.
- Format: Format to store the texture. Higher the accuracy is, better effect we will get with higher occupied memory space.
Bump Mapping
Bump mapping uses a texture to change the normals of model’s surfaces, in order to provide more details for the model. It won’t change the positions of vertex, instead makes the model look eneven(bump).
There is two approaches.
- Use a height map to simulate the displacement, then get a modified normal. This is also called height mapping.
- Use a normal map to directly store the surface normal. This is called normal mapping.
Height Map
Height map stores the intensity, which represents the height of model’s surface. The lighter the color is, the higher the surface is.
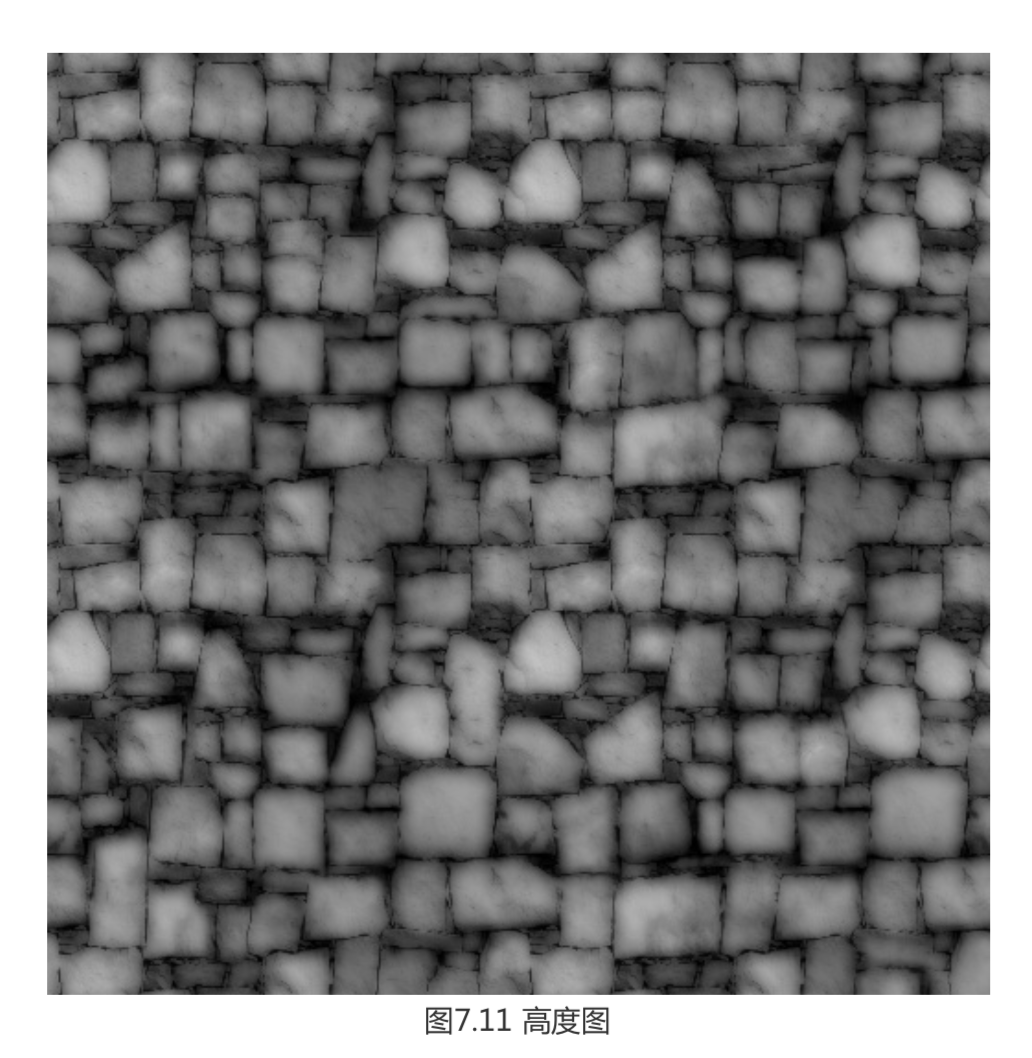
The advantage of height map is from it we can clearly know the bump degree of the model’s surface. However, we can’t directly retrieve the normal. We need to calculate the value by grayscale, which consumes more performance. Therefore, usually use normal mapping to modify light, while using height map to provide some other light’s information.
Normal Map
Normal map stores the normal direction of the surface, whose components are in range [-1, 1]. For a pixel, its components are from 0 to 1. Therefore we need a mapping:
pixel = (normal - 1) / 2
Direction is relative to coordinate space. For a normal of a vertex, it’s defined in object space, which is called object-space normal map.
However, in practice, we will another space called tangent space. Its origin is the vertex itself, z axis is the normal direction(n), x axis is the tangent direction(t), and y axis is obtained by the cross product of n and t. This kind of texture is called tangent-space normal map.
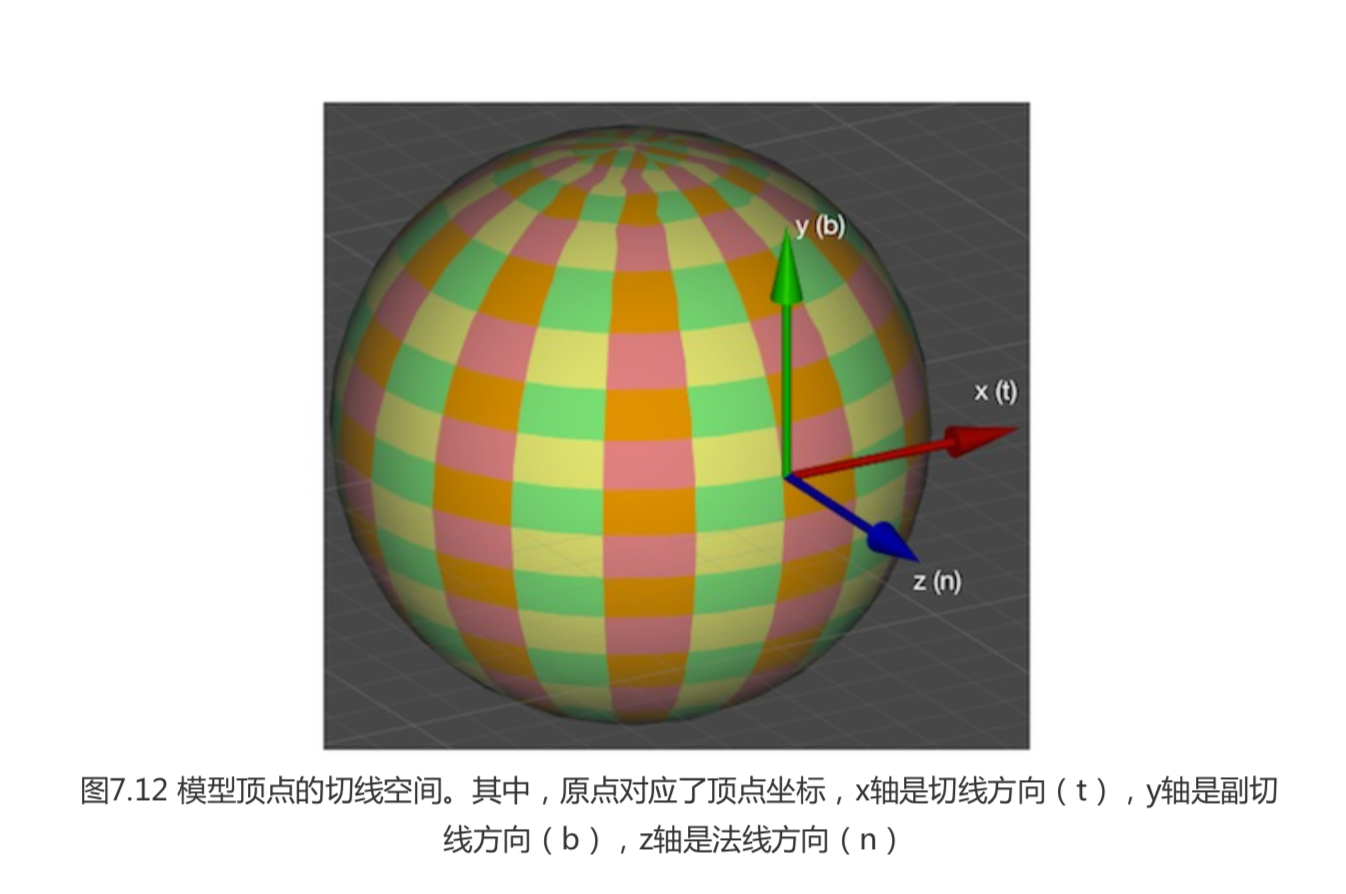
Comparison
- Object-space
- Easy and clear.
- Smooth boundary.
- Tangent-space
- High freedom.
- Ability to uv animation.
- Reusable.
- Compressible.
Code (In Tangent Space)
1 | Shader "Unity Shaders Book/Chapter 7/Normal Map In Tangent Space"{ |
Different Bump Scale
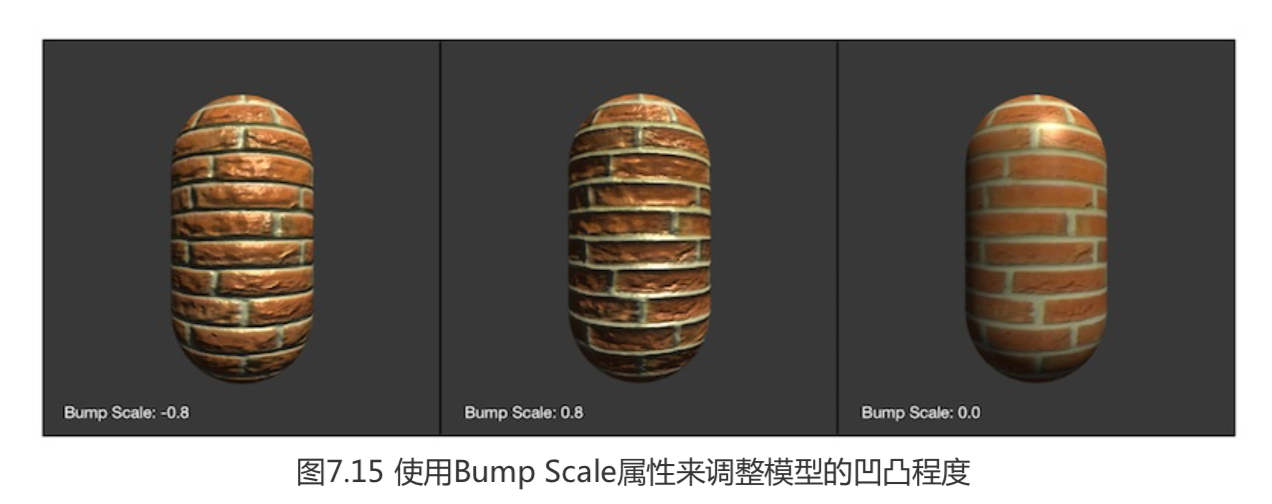
Normal Map Type
When we mark the texture as an normal map, we can use the built-in function UnpackNormal to retrieve the correct normal. In different platform, Unity will compress the texture in different ways.
If we import a height map, we can set Create from Grayscale check box to generate a normal map from it. Then we can treat this texture as a normal map.
Ramp Texture
Except defining the color of an object, we can also use texture to store any surface properties. One common usage is using ramp texture to control the result of diffuse lit.
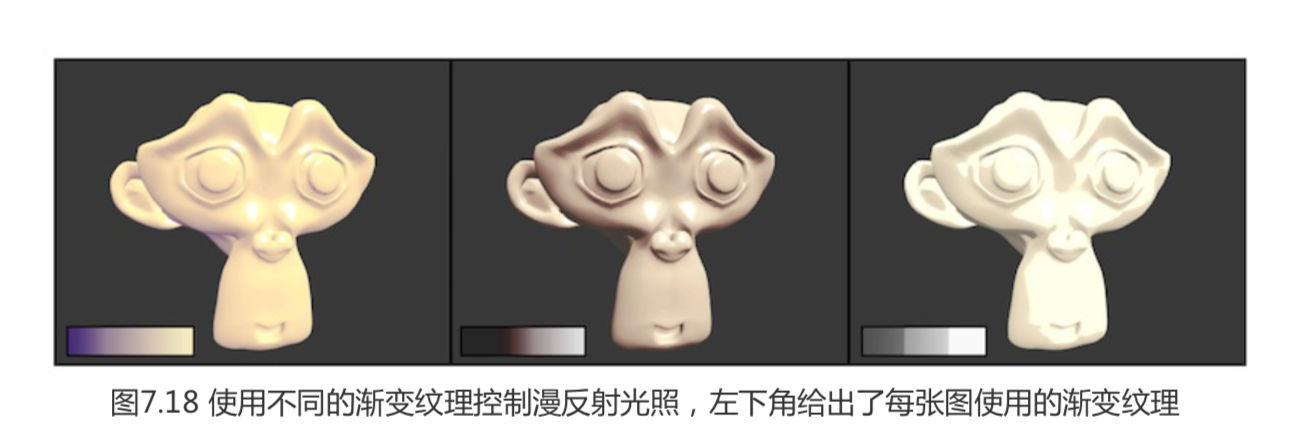
In ramp shading, the idea is to modulate the diffuse coefficient by a 1D lookup texture. Depending on what you put in this texture you can generate different effects.
1 | // Use the texture to sample the diffuse color |
Mask Texture
Mask texture allows us to protect some regions from being modulated.
The basic idea is to sample the texel from the mask texture, then multiply one of its channel’s value with one of the surface’s property.
1 | // Get the mask value |
In practice, we can use mask no only to protect some regions, but also control any proporties we want. For example, we use all the channels (RGBA) of a texture, the intensity of specular in R channel, the intensity of edge lighting in G channel, gloss of specular in B channel and intensity of emissive in A channel.